Kubernetes is the leading platform for orchestrating containerized microservices, but as systems scale, maintaining consistency across containers and managing hundreds of YAML files becomes challenging. This leads to duplication, configuration drift, and difficulty enforcing consistent standards—making automation essential.
Infrastructure as Code (IaC) tools like Terraform, Chef, and Pulumi address these issues by allowing you to define and provision Kubernetes clusters without GUIs. Terraform lets you declare Kubernetes resources efficiently, using a single configuration language for both infrastructure and applications. It also handles lifecycle management tasks like updates and deletions, streamlining your deployments and making it invaluable for scaling microservices architectures.
In this blog, we’ll cover:
- Why deploy with Terraform?
- The basics of Kubernetes manifest files and their limitations.
- When to use Terraform for Kubernetes.
- Creating deployments and services with Terraform.
- How to deploy, manage, and update Kubernetes resources.
- An introduction to Kapstan as an alternative.
Why Deploy with Terraform?
While tools like kubectl manage Kubernetes resources, Terraform offers several advantages:
- Unified Workflow: Use the same configuration language to provision clusters and deploy applications, streamlining your workflow.
- Full Lifecycle Management: Terraform not only creates resources but also updates and deletes them without manual API inspections.
- Dependency Graph: Terraform understands resource relationships, ensuring operations occur in the correct order. For example, it won’t attempt to create a Persistent Volume Claim if the Persistent Volume creation failed.
Deploy K8s with Terraform: An Introduction to Manifest Files
Kubernetes manifest files are YAML or JSON configurations that define the desired state of resources like pods, deployments, services, and namespaces. They instruct Kubernetes on how to deploy and manage applications within a cluster. Each manifest specifies configurations such as the number of replicas in a deployment, container images, resource limits, and environment variables. For example, here’s a manifest for a simple Nginx deployment:
apiVersion: apps/v1
kind: Deployment
metadata:
  name: nginx-deployment
  labels:
    app: nginx
spec:
  replicas: 3
  selector:
    matchLabels:
      app: nginx
  template:
    metadata:
      labels:
        app: nginx
    spec:
      containers:
      - name: nginx
        image: nginx:1.14.2
        ports:
        - containerPort: 80
[Manifest files Explained. Read more about manifest files here <- Add link to another Kapstan Blog.]
While manifest files offer a declarative approach—defining what you want rather than how to achieve it—they can become cumbersome as applications scale. Managing numerous YAML files often leads to inconsistencies, misconfigurations, and difficulties in version control and team collaboration, especially when files are scattered or poorly centralized.
To overcome these challenges, the Kubernetes ecosystem has embraced tools like Terraform and Helm. These tools enable developers to standardize application components across various environments, reduce errors, and improve maintainability.
How Does Terraform Make Deployment of Kubernetes Resources Easier?
Automates Manual Processes
Terraform eliminates time-consuming and error-prone manual tasks by using configuration files to describe infrastructure instead of relying on cloud consoles or terminal commands. This automation streamlines the deployment and management of Kubernetes resources.
Consistent State and Dependency Management
By aligning the desired and current states every time it’s run, Terraform automatically corrects discrepancies between the defined configuration and actual resources. This ensures that your infrastructure remains consistent with your specifications. It also maintains and ensures that the dependent resources are correctly provisioned and if there is an order for deployment, that is maintained.
Reduces Errors with Templates
Using templates minimizes risks such as misconfigurations or missed updates. Terraform enforces the desired state consistently on each run. For example, if a resource is accidentally deleted, Terraform recreates it based on the configuration file.
Unified Management Through Providers
By using providers like the Kubernetes provider, Terraform interacts with clusters and cloud resources, managing virtual machines, networks, and storage cohesively. For example, with one Terraform configuration, you can provision an AWS EKS cluster, deploy an NGINX container, and set up networking in a single workflow.
Centralized Infrastructure Management
Terraform offers a consistent approach to handling cloud and Kubernetes resources, making it ideal for large, dynamic projects that require constant infrastructure evolution. This allows teams to focus on defining what needs to be deployed while Terraform handles how it gets deployed.

The graphic above illustrates how Terraform uses a Kubernetes provider to provision the Kubernetes cluster.
- Developer prepares Terraform configuration files defining desired state of Kubernetes cluster (networking, security, node pools, etc.).
- Developer runs Terraform via CLI (e.g., terraform apply) to apply configuration changes.
- Terraform interacts with provider’s API to create and configure Kubernetes resources like namespaces, pods, and services.
- After provisioning, Terraform updates its state file to reflect current infrastructure for accurate tracking and efficient incremental updates.
- Terraform enforces desired state by applying necessary changes, eliminating configuration drift and ensuring seamless infrastructure updates.
- With the cluster provisioned, Terraform enables deployment and management of containerized applications across any infrastructure.
Setting Up Terraform Provider for Kubernetes
In this section, we will start creating the Kubernetes cluster using Terraform, which will begin with defining the providers, followed by the configuration of the cluster:
Terraform will handle the automation required for infrastructure provisioning, so you'll need to install it first.
Installing Terraform
- Go to the official Terraform download page.
- On the download page, select your operating system (Windows, macOS, or Linux).
- Once the download is complete, extract the contents of the zip file.
- Move the extracted 'terraform' binary to a directory in your system's PATH for easier access.
- Verify the installation
$ terraform version
Terraform v1.9.2
on windows_386
Your version of Terraform is out of date! The latest version
is 1.9.7. You can update by downloading from https://www.terraform.io/downloads.html
At the end, use the following .tf file for hands-on demonstration:
    config_path = "~/.kube/config"
}
resource "kubernetes_deployment" "nginx" {
  metadata {
    name = "scalable-nginx-app"
    labels = {
      App = "ScalableNginxApp"
    }
  }
  spec {
    replicas = 2
    selector {
      match_labels = {
        App = "ScalableNginxApp"
      }
    }
    template {
      metadata {
        labels = {
          App = "ScalableNginxApp"
        }
      }
      spec {
        container {
          image = "nginx:latest"
          name  = "nginx-app"
          port {
            container_port = 80
          }
          resources {
            limits = {
              cpu    = "500m"
              memory = "512Mi"
            }
            requests = {
              cpu    = "250m"
              memory = "50Mi"
            }
          }
        }
      }
    }
  }
}
Adding Configuration Path and Configuration Context
When a local kubernetes cluster is being used, such as KIND or Minikube, one practical way to guarantee that Terraform can communicate with your cluster is to specify the configuration file in the provider block. This file should include all the necessary details, such as the cluster’s endpoint, credentials, and certificate data, enabling Terraform to establish a connection and manage resources within the cluster effectively.
Now, let’s establish a Terraform provider with kubernetes. This involves setting the path to the Kubernetes configuration file, typically located at ~/.kube/config. This config file contains details like API server endpoint, private access keys, and certificates for the cluster. Terraform then uses it to authenticate and interact with the cluster.
provider "kubernetes" {
  config_path = "~/.kube/config"
}
Usually the config file is generated automatically when creating your local cluster with KIND or Minikube, but you can also generate the config file for your KIND Kubernetes cluster using the following command:
kind get kubeconfig --name my-cluster > ~/.kube/config.yaml
For Minikube use the following command:
minikube kubeconfig --profile my-profile > ~/.kube/config.yaml
If you are using a remote kubernetes cluster through cloud providers such as AWS, GCP, Azure and more. Then you can generate the kubernetes cluster cofig file for these services through their native cli tool. For example, for AWS EKS, you would need to use the following command:
aws eks update-kubeconfig --name cluster-name --region region-name
For GCP, use the following command:
gcloud container clusters get-credentials gke-cluster --region region-name
For Azure, use the following command:
az aks get-credentials --resource-group resource-group --name aks-cluster
Moreover, if multiple clusters are configured, similar configurations will be listed in the .kube/config file, which can lead to errors and conflicts in Terraform. As a workaround, the config_context argument can indicate which cluster to use in the Kubernetes provider configuration.
provider "kubernetes" {
  config_path    = "~/.kube/config"
  config_context = "cluster-context"
}
Creating Your Terraform Configuration
Since we understand how to set up Terraform’s provider for Kubernetes, we focus on creating Kubernetes deployments and resources using Terraform for our local cluster in this section.
How do you deploy a Manifest file in Kubernetes with Terraform?
There are two ways to deploy the Kubernetes cluster with Terraform. The first one is where we have a separate manifest file, which, in this case, is a nginx-manifest.yaml manifest file:
apiVersion: apps/v1
kind: Deployment
metadata:
  name: nginx
  labels:
    app: nginx
spec:
  replicas: 1
  selector:
    matchLabels:
      app: nginx
  template:
    metadata:
      labels:
        app: nginx
    spec:
      containers:
        - name: nginx
          image: nginx:latest
          ports:
            - containerPort: 80
You can refer to this manifest file using the kubernetes_manifest resource type in the provider.tf file:
provider "kubernetes" {
  . . .
}

resource "kubernetes_manifest" "nginx_deployment" {
  manifest = yamldecode(file("${path.module}/nginx-deployment.yaml"))
}
If you don’t want to create a separate manifest file for the cluster, you can use the resource type kubernetes_deployment to deploy your pod. This approach is typically suitable for Kubernetes deployments that don't require extensive customization and allow you to manage all your resources from a single location. With Terraform configuration, you can manage your infrastructure, including Kubernetes clusters and the applications running within them, helping to avoid errors caused by misconfigured YAML files.
provider "kubernetes" {
  config_path = "~/.kube/config"
}

resource "kubernetes_deployment" "nginx" {
  metadata {
    name = "scalable-nginx-app"
    labels = {
      App = "ScalableNginxApp"
    }
  }

  spec {
    replicas = 2

    selector {
      match_labels = {
        App = "ScalableNginxApp"
      }
    }

    template {
      metadata {
        labels = {
          App = "ScalableNginxApp"
        }
      }

      spec {
        container {
          name  = "nginx"
          image = "nginx:latest"

          port {
            container_port = 80
          }
        }
      }
    }
  }
}
You can check the HashiCorp tutorial for insight on structuring your Terraform configuration file.
Terraform Configuration for NGINX deployment on Local Cluster
Now, the first thing that you need to do is define your deployment config in a Terraform configuration file.
In this section, you will use Terraform to set up a sample NGINX application on top of a local or on-premise kubernetes cluster.
Similar to what we discussed above, set the config path in the Kubernetes provider block. For this terraform configuration file example, we will use the preferred method with the kubernetes_deployment resource to define the deployment and some metadata such as the app name, which is scalable-nginx-app, labels for identification, etc.
The deployment is configured to create two replicas of an NGINX container using the nginx:latest image. Each container listens on port 80 and is assigned resource requests and limits. The containers request a minimum of 250m CPU and 50Mi memory while limiting usage to 500m CPU and 512Mi memory, ensuring performance and resource efficiency.
provider "kubernetes" {
config_path = "~/.kube/config"}
resource "kubernetes_deployment" "nginx" {
metadata {
name = "scalable-nginx-app"
labels = {
App = "ScalableNginxApp"
}
}

spec {
replicas = 2    selector {
match_labels = {
App = "ScalableNginxApp"
}
}

template {
metadata {
labels = {
App = "ScalableNginxApp"
}
}

spec {
container {
image = "nginx:latest"
name  = "nginx-app"
port {
container_port = 80
}

resources {
limits = {
cpu    = "500m"
memory = "512Mi"
}

requests = {
cpu    = "250m"
memory = "50Mi"

						}
					}
				}
			}
		}
	}
}
Deploying Manifests with Terraform
Now, using the above code, initialize the Terraform configuration. It installs the necessary provider plugins, here AWS, Kubernetes, and modules.
Similar to what we performed earlier, use the terraform init command:
$ terraform init
Initializing the backend...
Initializing provider plugins...
- Finding latest version of hashicorp/kubernetes...
- Installing hashicorp/kubernetes v2.33.0...
- Installed hashicorp/kubernetes v2.33.0 (signed by HashiCorp)
Terraform has been successfully initialized!
Use the terraform apply command to deploy your infrastructure. Running this command will prompt you to review the infrastructure changes requested for the desired setup.
$ terraform apply
Plan: 1 to add, 0 to change, 0 to destroy.
Do you want to perform these actions?
Terraform will perform the actions described above.
Only 'yes' will be accepted to approve.
Enter a value: yes
kubernetes_deployment. nginx: Creating...
kubernetes_deployment.nginx: Still creating... [10s elapsed]
kubernetes_deployment. nginx: Creation complete after 16s [id=default/scalable-nginx-app]
Apply complete! Resources: 1 added, 0 changed, 0 destroyed.
After the Deployment, you can check your NGINX deployment in the cluster.
$ kubectl get deploy
NAME READY UP-TO-DATE AVAILABLE AGE
scalable-nginx-app 2/2 2 2 4m55s
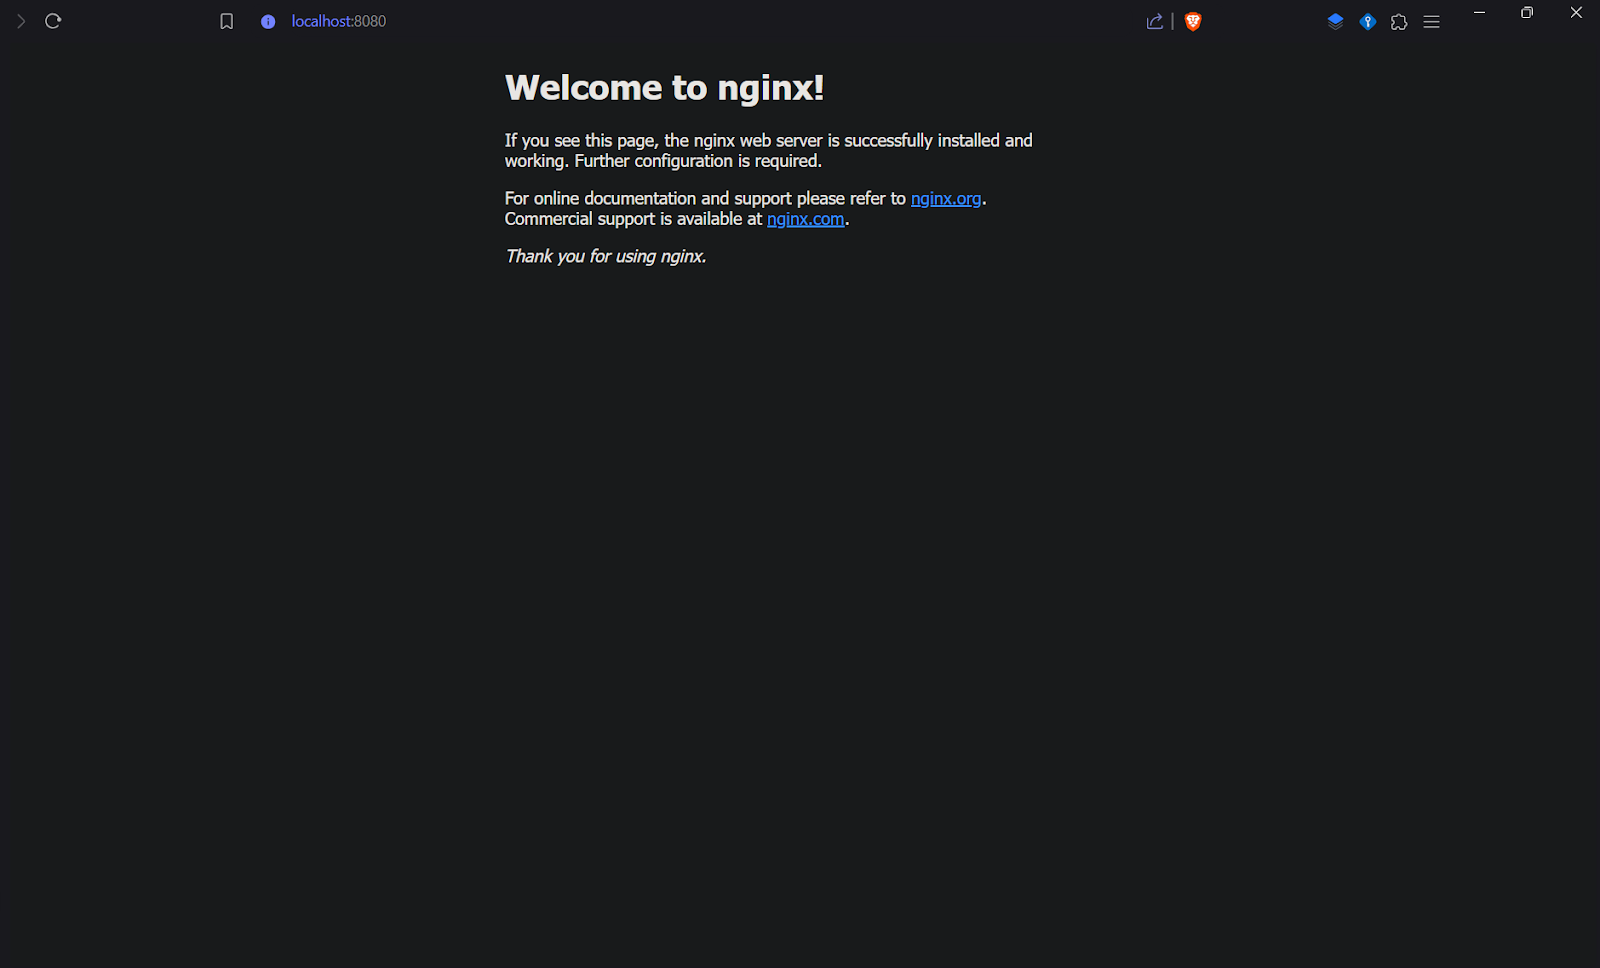
You can then access the NGINX Welcome page on your browser by port-forwarding the deployed pods:
$ kubectl port-forward deployment/scalable-nginx-app 8080:80
Port forwarding for a remote Kubernetes deployment works similarly to a local setup but requires access to the remote cluster, as discussed above. This method enables you to securely forward a local port to a port on a pod in the remote deployment, allowing you to interact with the application as if it were running locally.
To verify that the application is running, open your browser and go to localhost:8080.
Managing the Resource State on your Kubernetes Cluster
You can use the terraform state list command to inspect the resources that Terraform manages in the state file. This will provide a list of all the resources that Terraform is tracking.
Let’s run it for the local kubernetes cluster. It will show something like this.
$ terraform state list
kubernetes_deployment.nginx
Common issues when using Terraform for Kubernetes
Terraform is a great tool for managing Kubernetes resources, but it comes with its own set of challenges, which you should be aware of:
- Frequent changes like creating, deleting, or restarting pods happen automatically within Kubernetes and often outside Terraform's control. As a result, Terraform's state file, which tracks the resources it manages, may become out of sync with the actual cluster state. This misalignment is called "drift" and complicates managing resources over time.
- Manual changes made directly in the Kubernetes cluster add to this issue. Since Terraform relies on its state file as the single source of truth, any changes bypassing Terraform can cause discrepancies. This design ensures consistent configuration but requires careful coordination to maintain synchronization.
- Another significant challenge with Terraform is handling failures during an apply operation. Unlike Kubernetes, which allows easy rollbacks to a previous deployment version, Terraform doesn't have native rollback functionality. If an apply fails, restoring the system to a stable state often requires manual intervention or reverting to a backup state file. This can be particularly problematic in production environments, where quick recovery is critical for maintaining stability.
Introduction to Kapstan as a Solution
Starting from scratch when configuring and maintaining Kubernetes clusters can be difficult and time-consuming. Setting up several configuration files and managing dependencies, network settings, and resources are necessary when configuring clusters with tools like Terraform. To ensure everything works well after installation, there are more steps to take, such as creating Terraform scripts for every service, manually controlling scaling settings, and monitoring credentials and secrets. This conventional method can soon become unwieldy as your clusters and resources increase due to its frequent repeating configuration.
Kapstan offers an answer to these problems. Its user-friendly interface eliminates the need to manually create intricate Kubernetes manifest files or Terraform setups. Kapstan allows you to set up, scale, and manage Kubernetes clusters easily without dealing with the intricate parameters that are usually needed. It is simpler to get clusters up and running and managed without the typical deployment and post-installation complications thanks to this expedited method, which saves time.
Creating Kubernetes Clusters and Resources Using Kapstan’s UI
Kapstan’s UI enables you to create and manage Kubernetes clusters with just a few clicks. We will integrate our AWS account with Kapstan’s CloudFormation template for this.
Getting started with Kapstan:
Start by making an account in Kapstan and create or join an organization.
Next, refer to Kapstan's official documentation for connection instructions.

Creating Environment in Kapstan:
You will need first to create an environment within your Kapstan dashboard.
To proceed, navigate to the environment page of your dashboard and refer to Kapstan's official documentation on how to create a new environment.
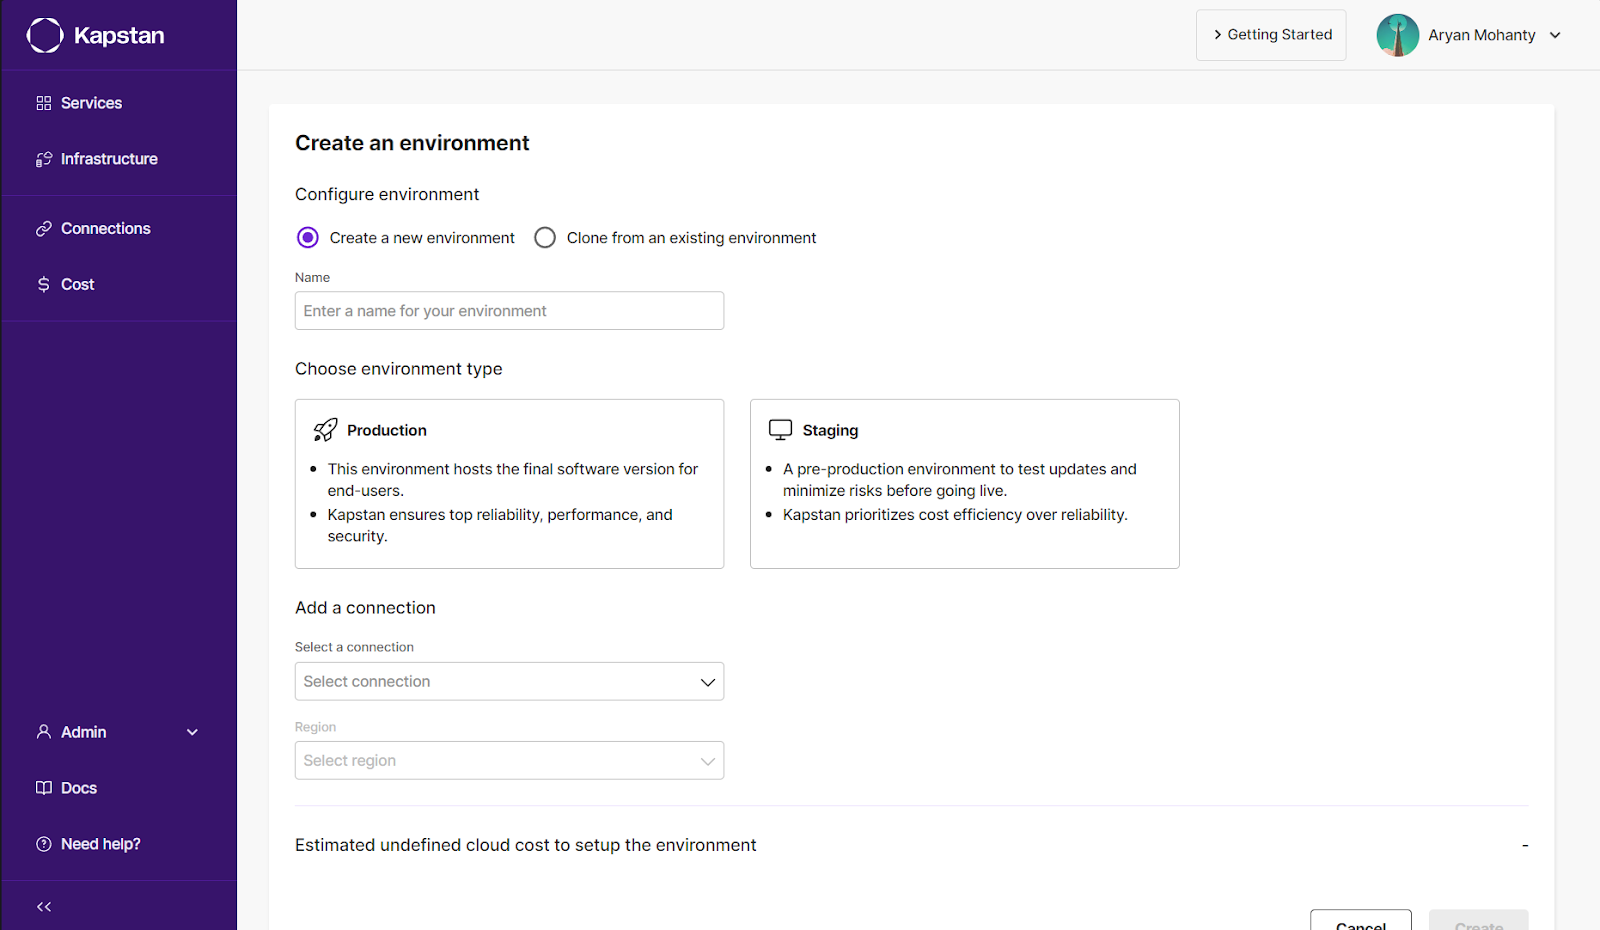
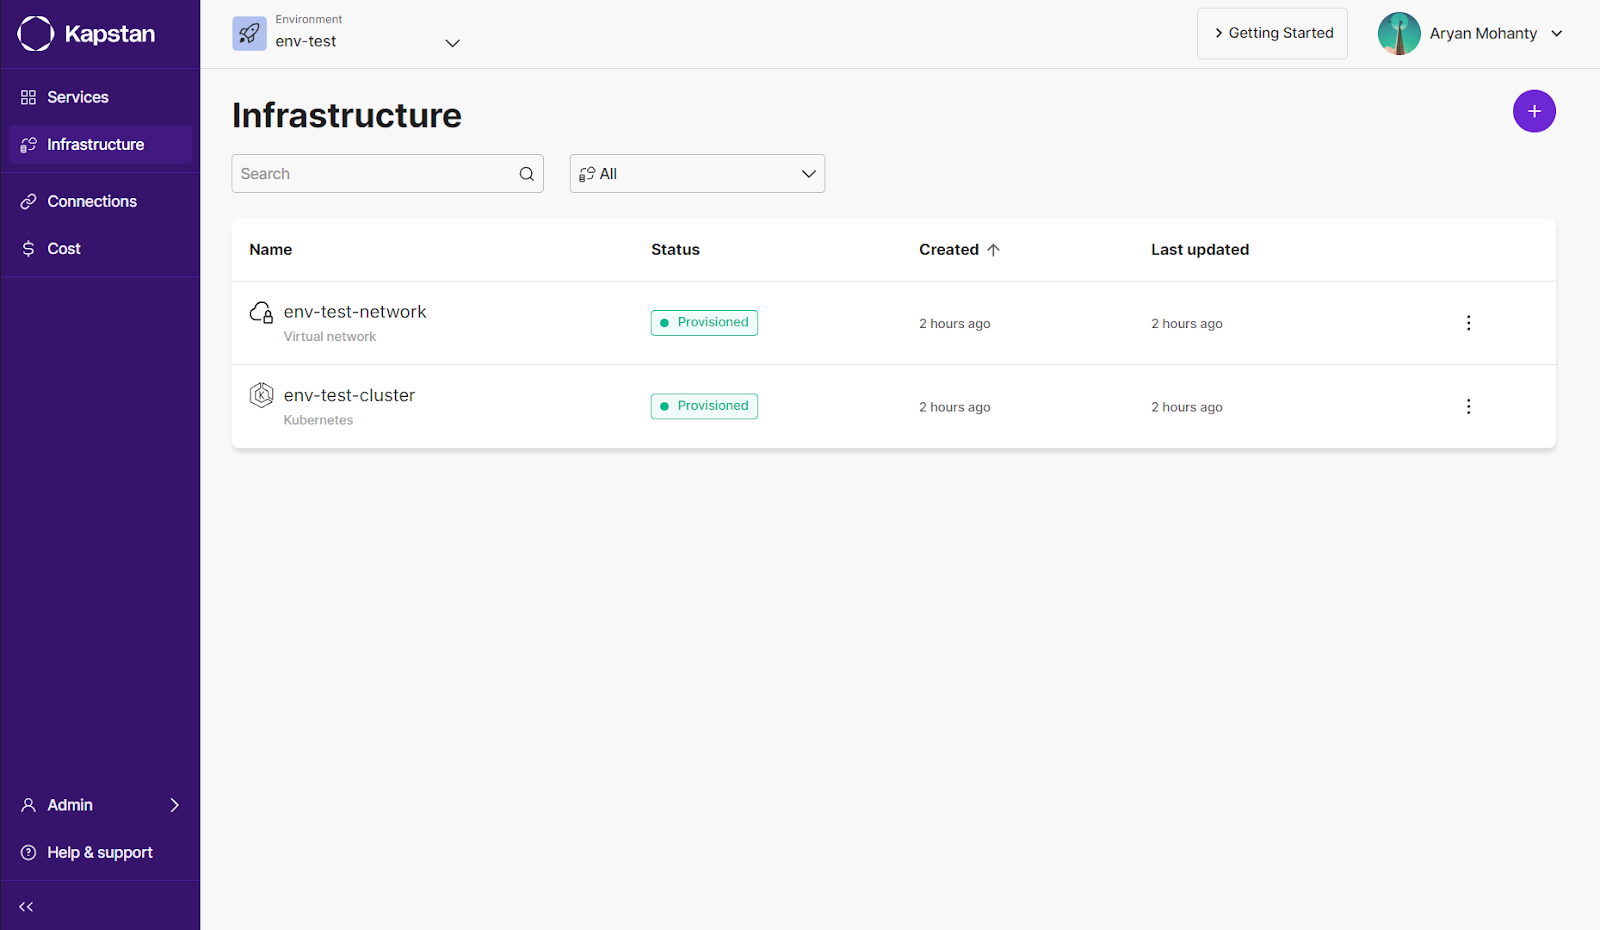
When you create a new environment, Kapstan automatically creates a new Virtual Network and Kubernetes Cluster. This ensures you are ready to deploy your container or Helm Chart without any unnecessary steps.
Adding Helm Resources or Docker Images to the Cluster
One of the critical features of Kapstan is its ability to integrate Helm charts and Docker images into a Kubernetes cluster without manual configuration. Users can add Helm resources or Docker images directly through the UI by selecting the desired chart or image and specifying configuration options. Kapstan then handles the deployment to the cluster. This significantly reduces the complexity of setting up resources, making it easier to manage applications and services in your Kubernetes environment.
Deploying Container:
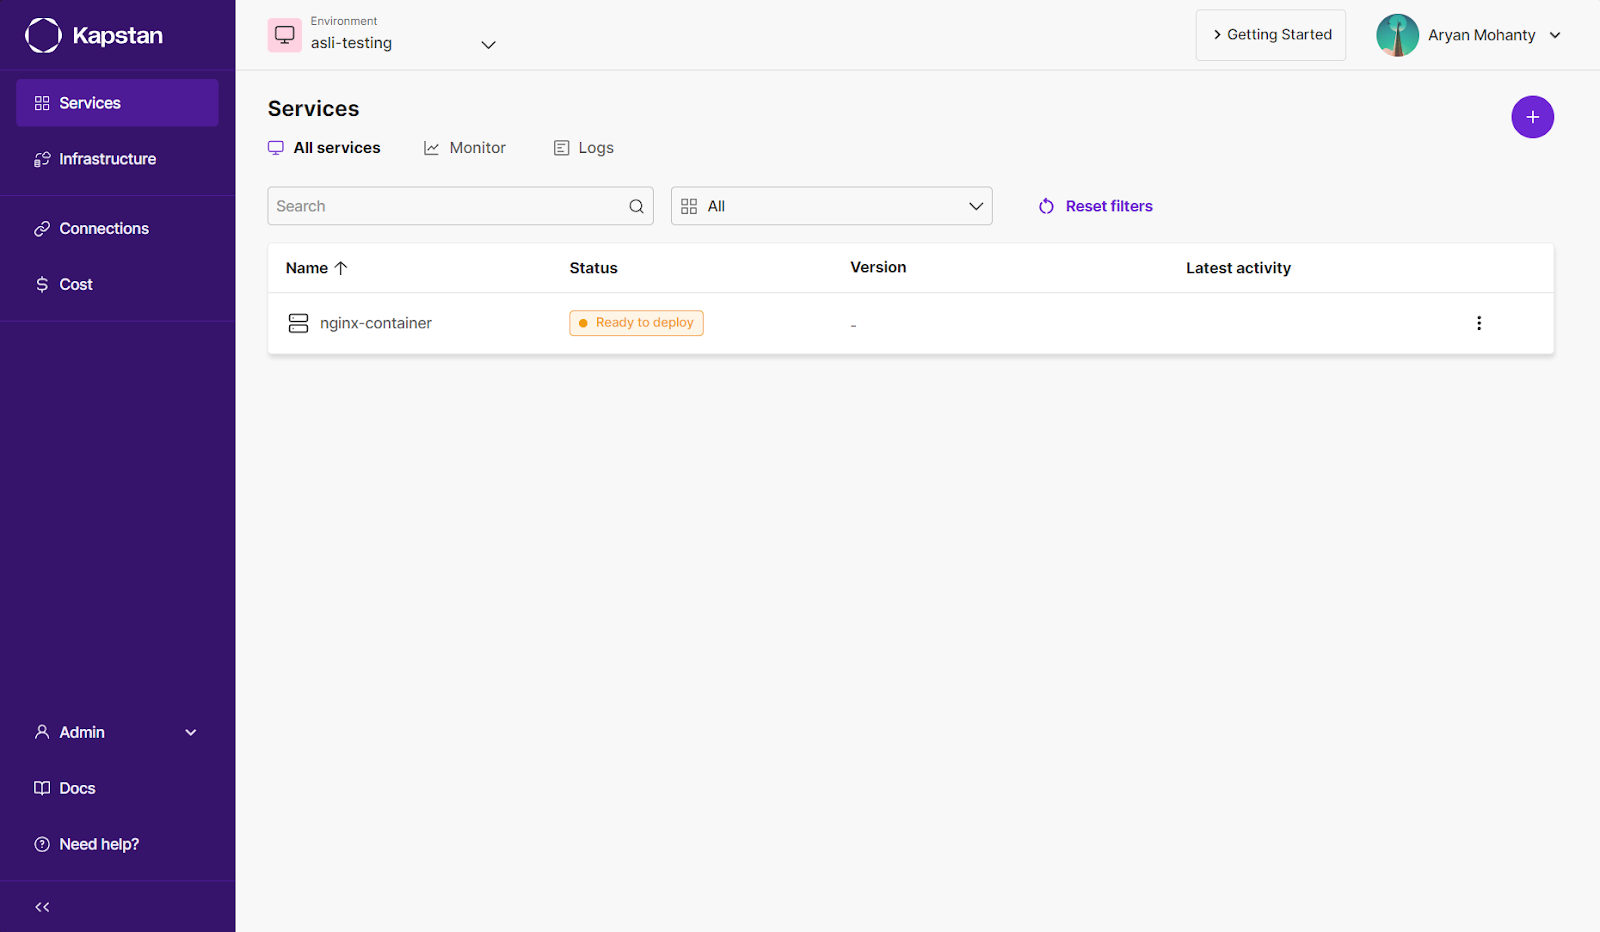
Follow these simple steps to create a simple container in your provisioned cluster:
- Go to the Dashboard’s Service page.
- Then click on the plus icon and choose containers.
- Select the Kubernetes cluster for deployment and enter a name for your application.
- Next, select a container registry for the same.
- If you have chosen the Public repository, then enter the Public repository URL and the image tag.
- If you have selected a private repository, specify the image repository and tag.
- Next, enter the Entrypoint command and CMD arguments, as those fields are optional.
- Finally, click on “Confirm” to create the application.
Deploying Public HELM Charts:
Similar to deploying the container, you can follow these simple steps to create a pods in your provisioned cluster using Public HELM Charts:
- Go to the Dashboard’s Service page.
- Then click on the plus icon and choose Public HELM Charts.
- Select the Kubernetes cluster for deployment and enter a name for your application.
- Next, enter the repository's public URL.
- After that, enter the name of the chart you want to deploy.
- Then, enter the chart version as well.
- Lastly, you can provide an override YAML configuration for the helm chart.
- Finally, click on “Confirm” to create the application.
Cluster Management with Horizontal Pod Autoscaler and Secret Manager
Kapstan simplifies managing critical Kubernetes resources like the Horizontal Pod Autoscaler and Secret Manager. Instead of writing complex YAML configurations or using command-line tools, you can enable these features directly from the UI. Kapstan automates creating and managing these resources, ensuring your cluster is scalable and sensitive data is securely handled.
So, after you have added your container or HELM Chart details to create the application, you can provide additional configuration to the service:
- Click on the newly created service and go to the “configure” tab.
- In this tab, you can fine-tune the configuration for deployment by specifying the environmental variables and scaling parameters, including Auto Scaling.
This autoscaling is achieved by using Auto Scaling triggers, which enable you to scale your applications based on various external metrics, providing more granular control and flexibility in managing application load. This setup is powered by Kubernetes Event-driven Autoscaling (KEDA). This is a Kubernetes Special Interest Group project that provides event-driven autoscaling. Allowing you to scale your deployments based on various events, such as message queue lengths, HTTP requests, or other custom metrics.
To implement KEDA on your local or any form of kubernetes clusters, install KEDA using kubectl:
$ kubectl apply -f https://github.com/kedacore/keda/releases/download/v2.7.1/keda-2.7.1.yaml
Now, for your deployment manifest file, which looks like this:
apiVersion: apps/v1
kind: Deployment
metadata:
  name: my-app
spec:
  replicas: 1
  selector:
    matchLabels:
      app: my-app
  template:
    metadata:
      labels:
        app: my-app
    spec:
      containers:
      - name: my-app
        image: my-app-image
        ports:
        - containerPort: 8080
You need to create a ScaledObject manifest file to handle the resource utilization using KEDA. Here is an example script for the same:
apiVersion: keda.sh/v1alpha1
kind: ScaledObject
metadata:
  name: my-app-scaledobject
  namespace: default
spec:
  scaleTargetRef:
    name: my-app
  minReplicaCount: 1
  maxReplicaCount: 10
  triggers:
    - type: rabbitmq
      metadata:
        queueName: my-queue
        host: 127.0.0.1:9000
        queueLength: '5'
      authenticationRef:
        name: rabbitmq-auth
Then, apply these manifest files to your kubernetes cluster:
$ kubectl apply -f my-app-deployment.yaml
$ kubectl apply -f my-app-scaledobject.yaml
This setup will configure your rabbitMQ message broker for autoscaling.
With KEDA in place, you're leveraging Kubernetes-native event-driven autoscaling, which is employed in this scenario. In such a case, external metrics like message queue lengths can scale the resources dynamically. This manual configuration is very effective because the user needs to apply a YAML manifest file specific to the application's deployment and scaling aspect, such as the “ScaledObject” type.
Kapstan automates this manual step, providing a more efficient UI and allowing the user to avoid setting up the KEDA components. Enabling the autoscaling functionality via Kapstan is more accessible than writing and editing YAML files for managing autoscaling.
- You can turn on Auto Scaling to specify the maximum and minimum number of pods you want to deploy in this service.
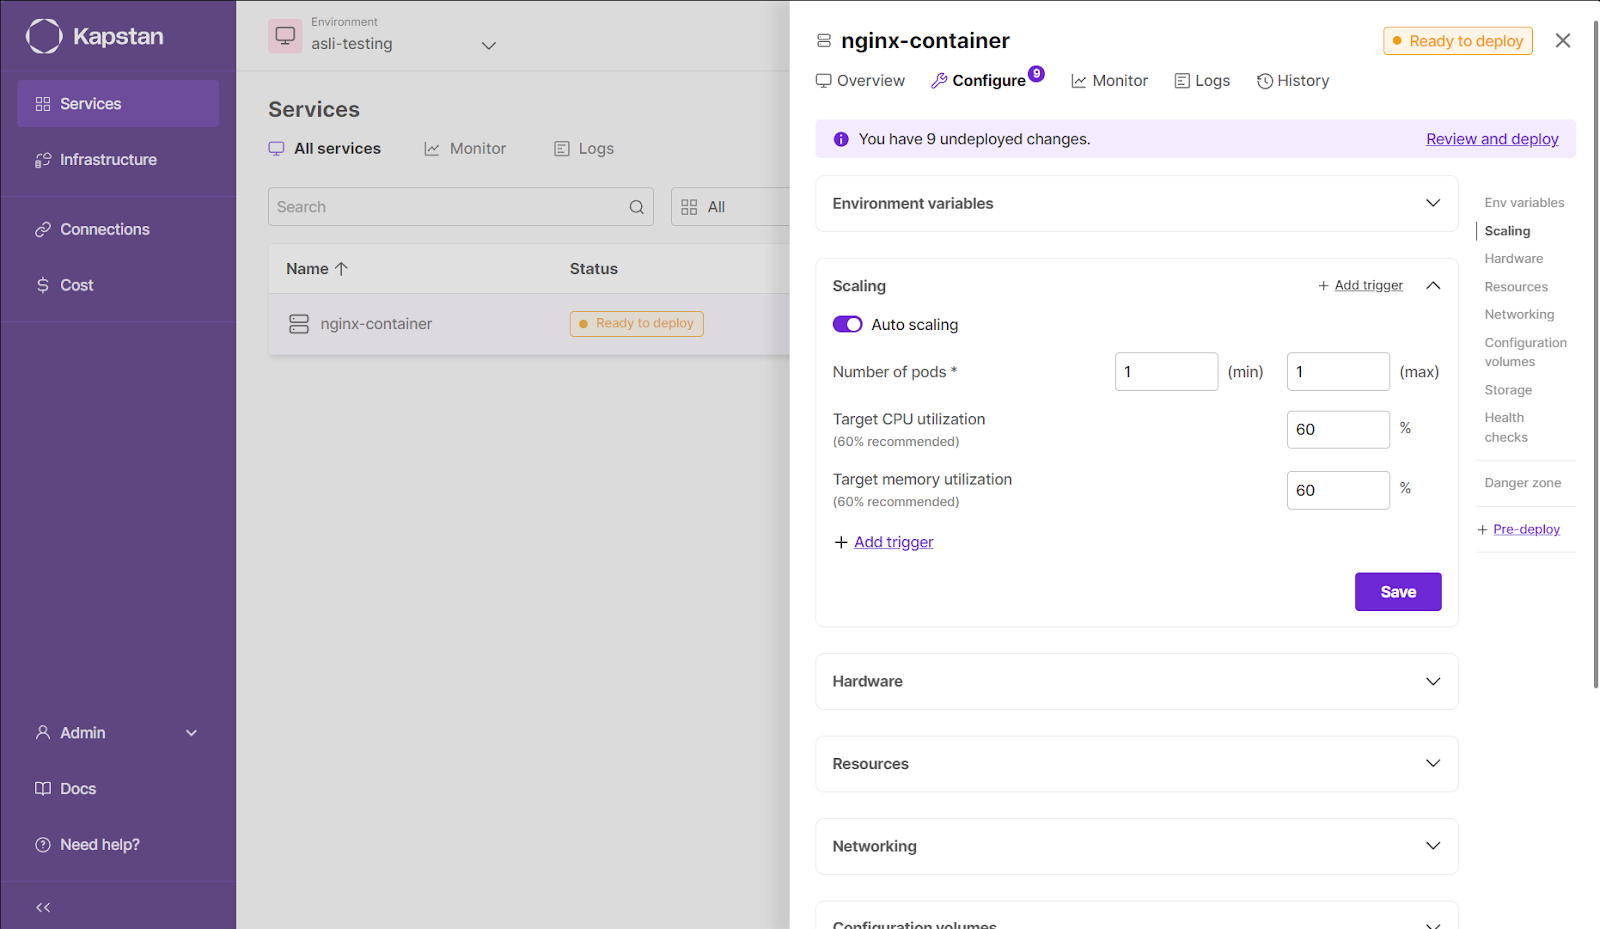
- The architecture's hardware type can be modified to enable GPU infrastructure and SPOT instances.
- There are also options to adjust resource utilization by specifying idle CPU and memory consumption.
- The dedicated networking option allows for selecting operational ports and connecting domains to the container.
- Additional volumes or storage can be configured as needed.
- Lastly, the health check section monitors container health using liveness and readiness probes.
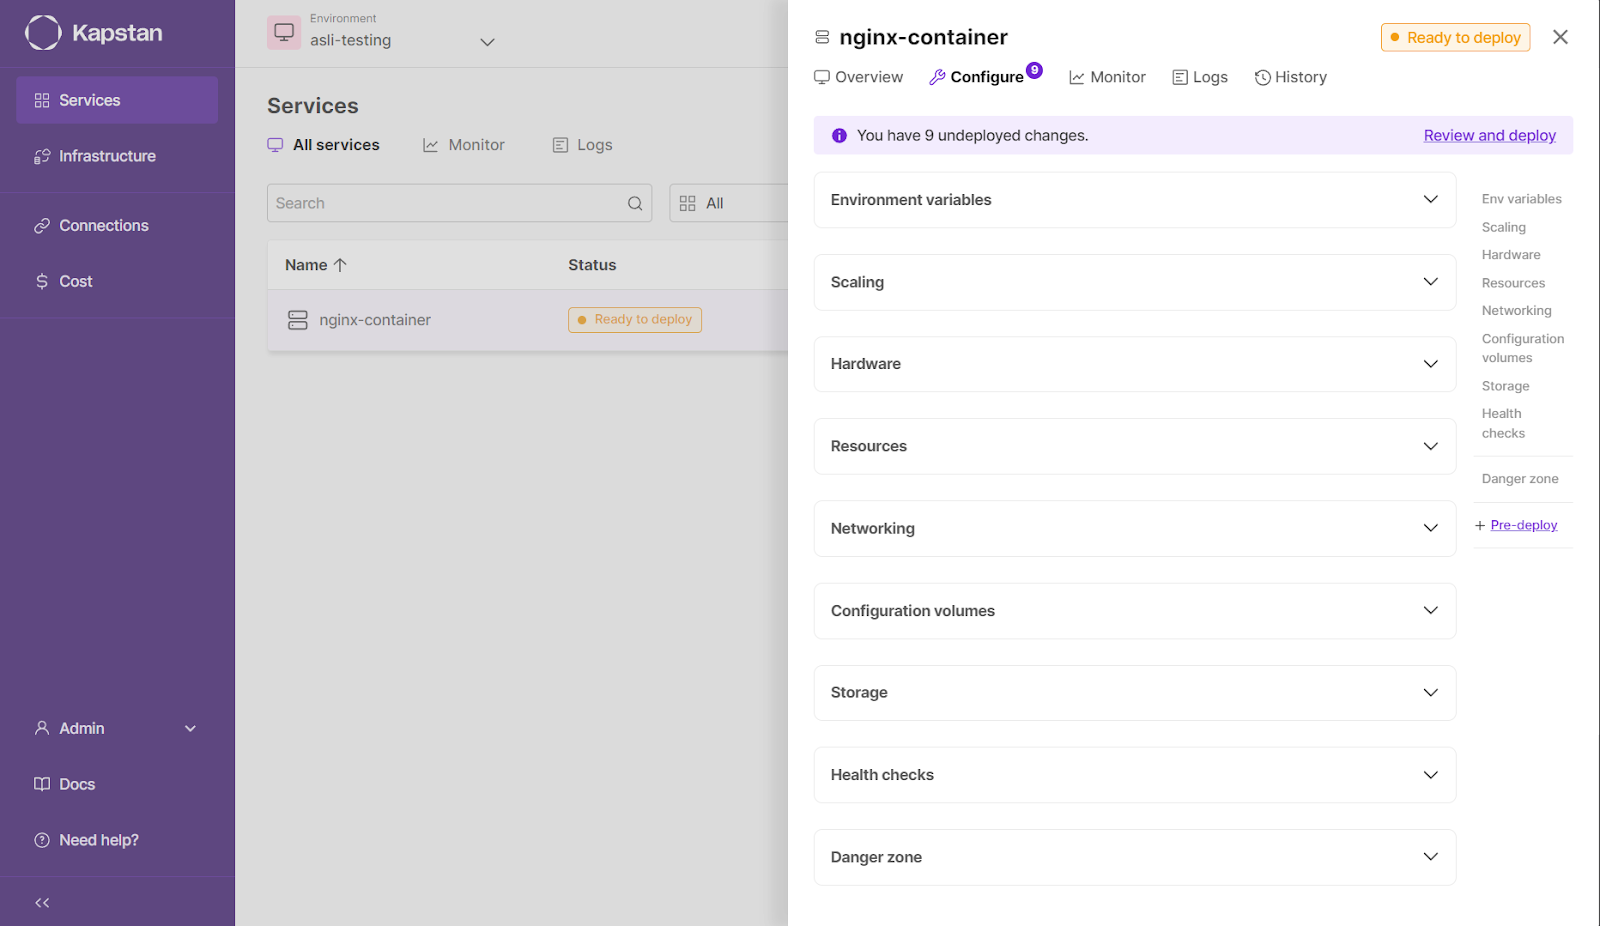
After this, if everything is up to your expectations, you can deploy the container by going to the overview tab.
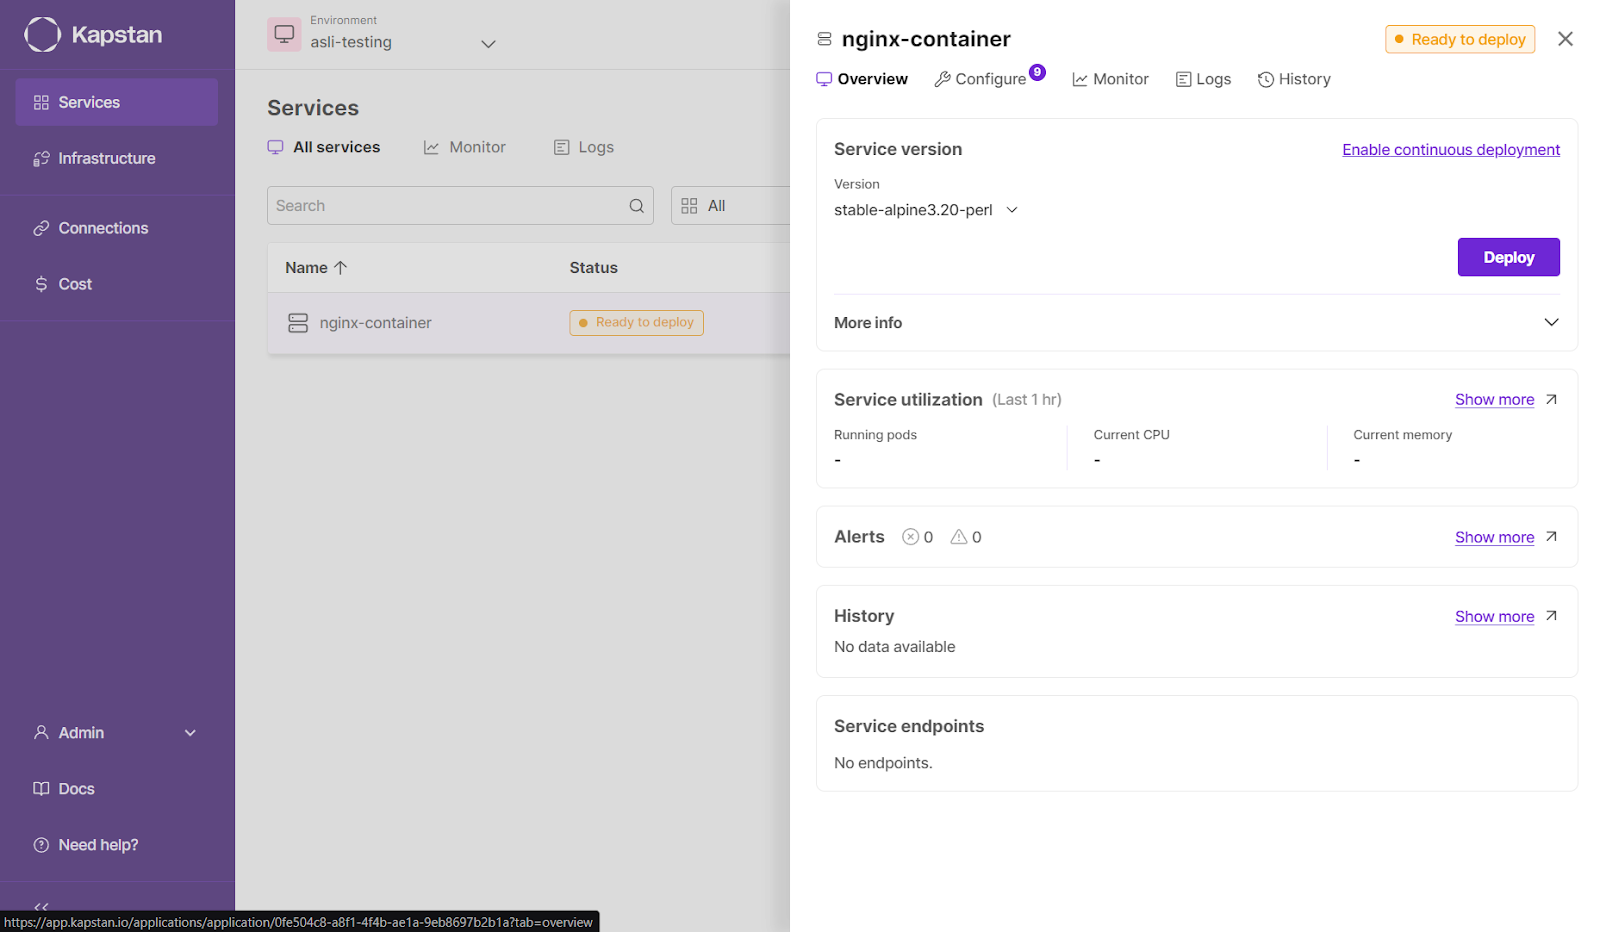
And deploy.

Conclusion
By using Terraform, we can define Kubernetes resources in a reusable and automated way, eliminating manual configuration and reducing errors. This approach facilitates steady, dependable, and scalable deployments even in complicated infrastructures. Cluster management is made more accessible by tools such as Kapstan, as it provides a straightforward way to modify resources, set up namespaces, and scale service, enhancing team efficiency and speed in implementation. In this blog, we have illustrated how immutable deployments make predictable systems more predictable through versioning every change, how Terraform makes Kubernetes deployment consistent, and how Kapstan makes deployments simple yet efficient. Using Infrastructure as Code (IaC) resources with Kubernetes and its tools like Kapstan makes it possible to create reliable and flexible systems that encourage rapid development while keeping costs low and efficient, high-quality services to be provided.
__________________________________________________
Frequently Asked Questions
- How to deploy a YAML file in Kubernetes with Terraform?
- Can you use Terraform to deploy Kubernetes?
- Can Kubernetes replace Terraform?
- What are the benefits of Terraform with Kubernetes?
_________________________________________________
Highlighted Referenced Links


